Edit the Navigation
Precondition
Make sure you
- are logged in.
- have already created the content, that you want to link in the navigation.
How the navigation works
Unlike you may know it from other website systems or the filesystem on your computer, the WordPress Navigation is independent from your posts and pages. This comes with the advantage of great flexibility at the price of counterintoutiveness.
Think of the navigation as a big list of links, hierarchically ordered. If you create a new page, you have to explicitly add it to the link list aka navigation.
Edit the navigation
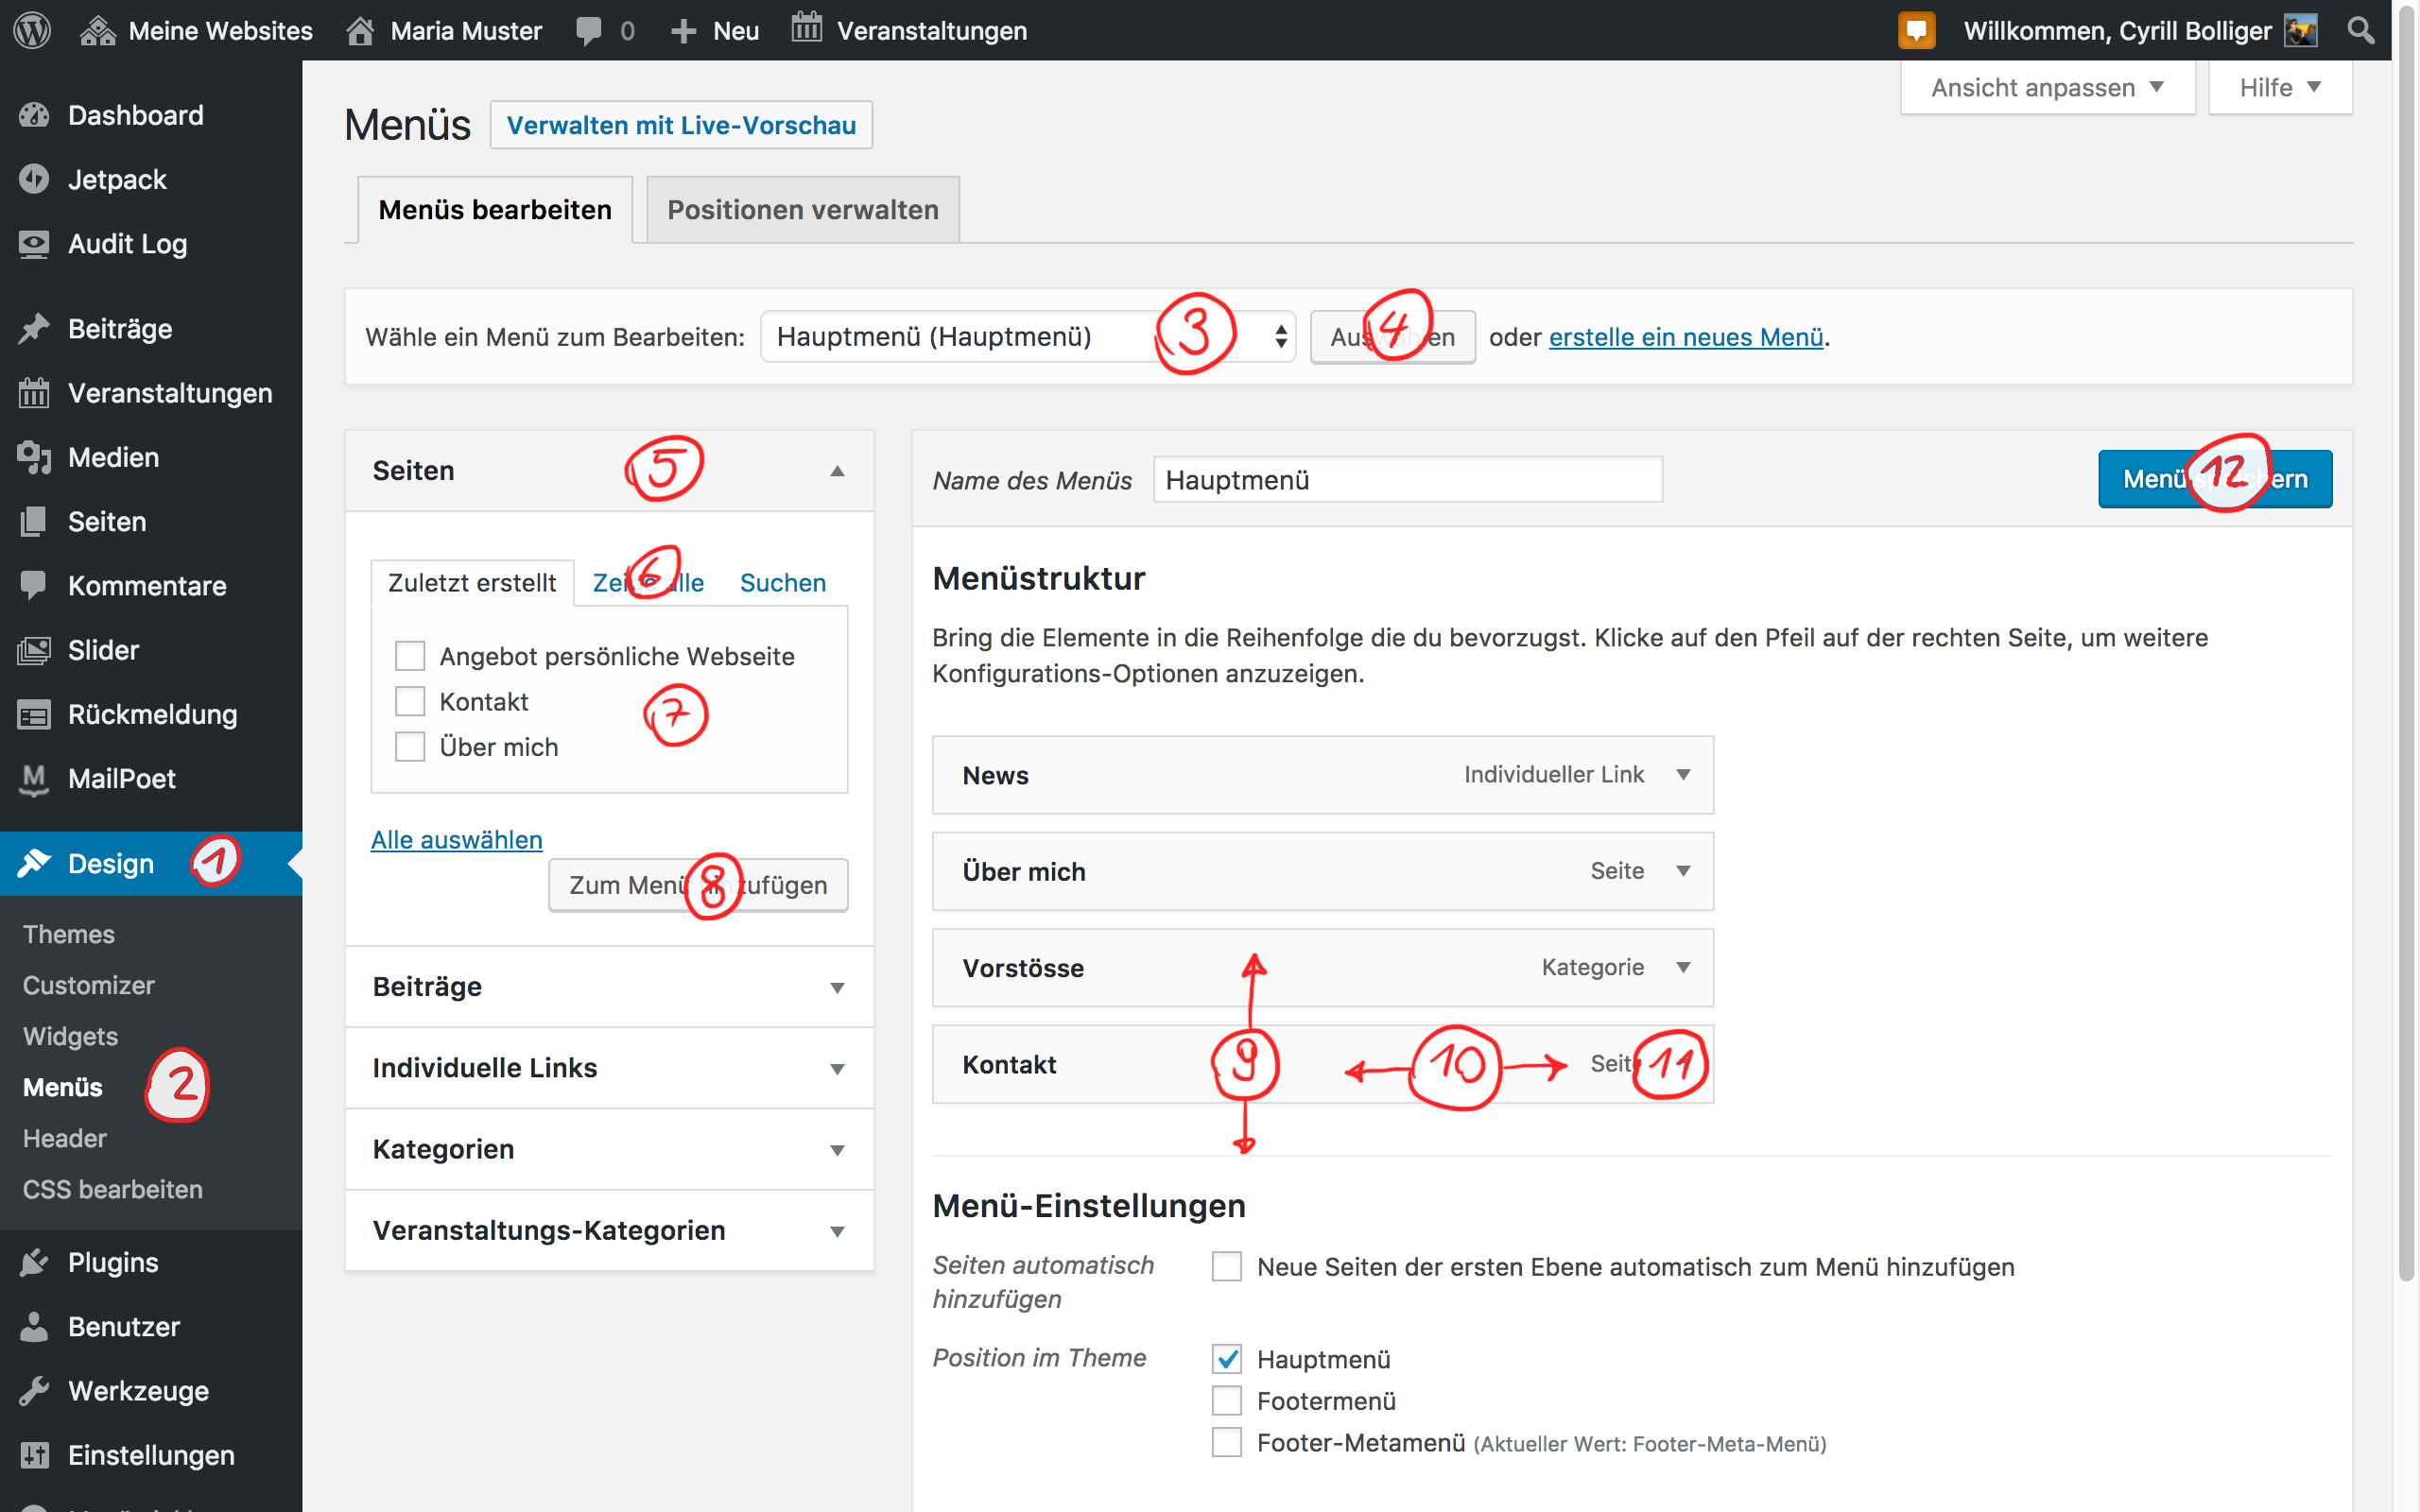
- In the backend goto Design (1) > Menus (2).
- Select the navigation you want to edit (3) and click select (4). Generally you want to edit the main-navigation.
- To add a page, expand the page accordion element on the left (5), tick the page you want to add (7) and click Add to Menu (8). If the page isn't in the list click View All to browse the full list (6).
- The page is now appended to the bottom of your link list. Drag it into the right order (9) and the right hierarchy (10).
- When expanding the newly added navigation entry (11) you, you can customize it's label in the menu or remove it.
- Finally you have to save the changes (12).
Note: Limit the number of top level menu entries to a maximum of five. Nest your navigation if you have more entries to add. To have at most five top level entries is no only best practice in terms of user experience, but also a design limitation of the theme.
Nesting the entries
Nest your navigation by click dragging any item to the right, just below its future parent item. You can have at most three navigation levels.
Note: If you nest the navigation, your root element is no longer clickable (it just opens the subnavigation). If you want the root element to be a reachable link, add it again as submenu entry. You may want to rename the root element (11).
Adding posts
Usually you only add pages directly to the navigation. Posts are normally linked over it's category. There may however be exceptions. Add them similarly as pages.
Categories / Archives
Categories in the navigation add links to the archive page of all posts of the given category. New posts will be added automatically, you won't have to change the navigation.
Custom Links
Custom Links can be used to add some external links to the navigation. This can, for example come in handy, if you want to link to the page of your party.
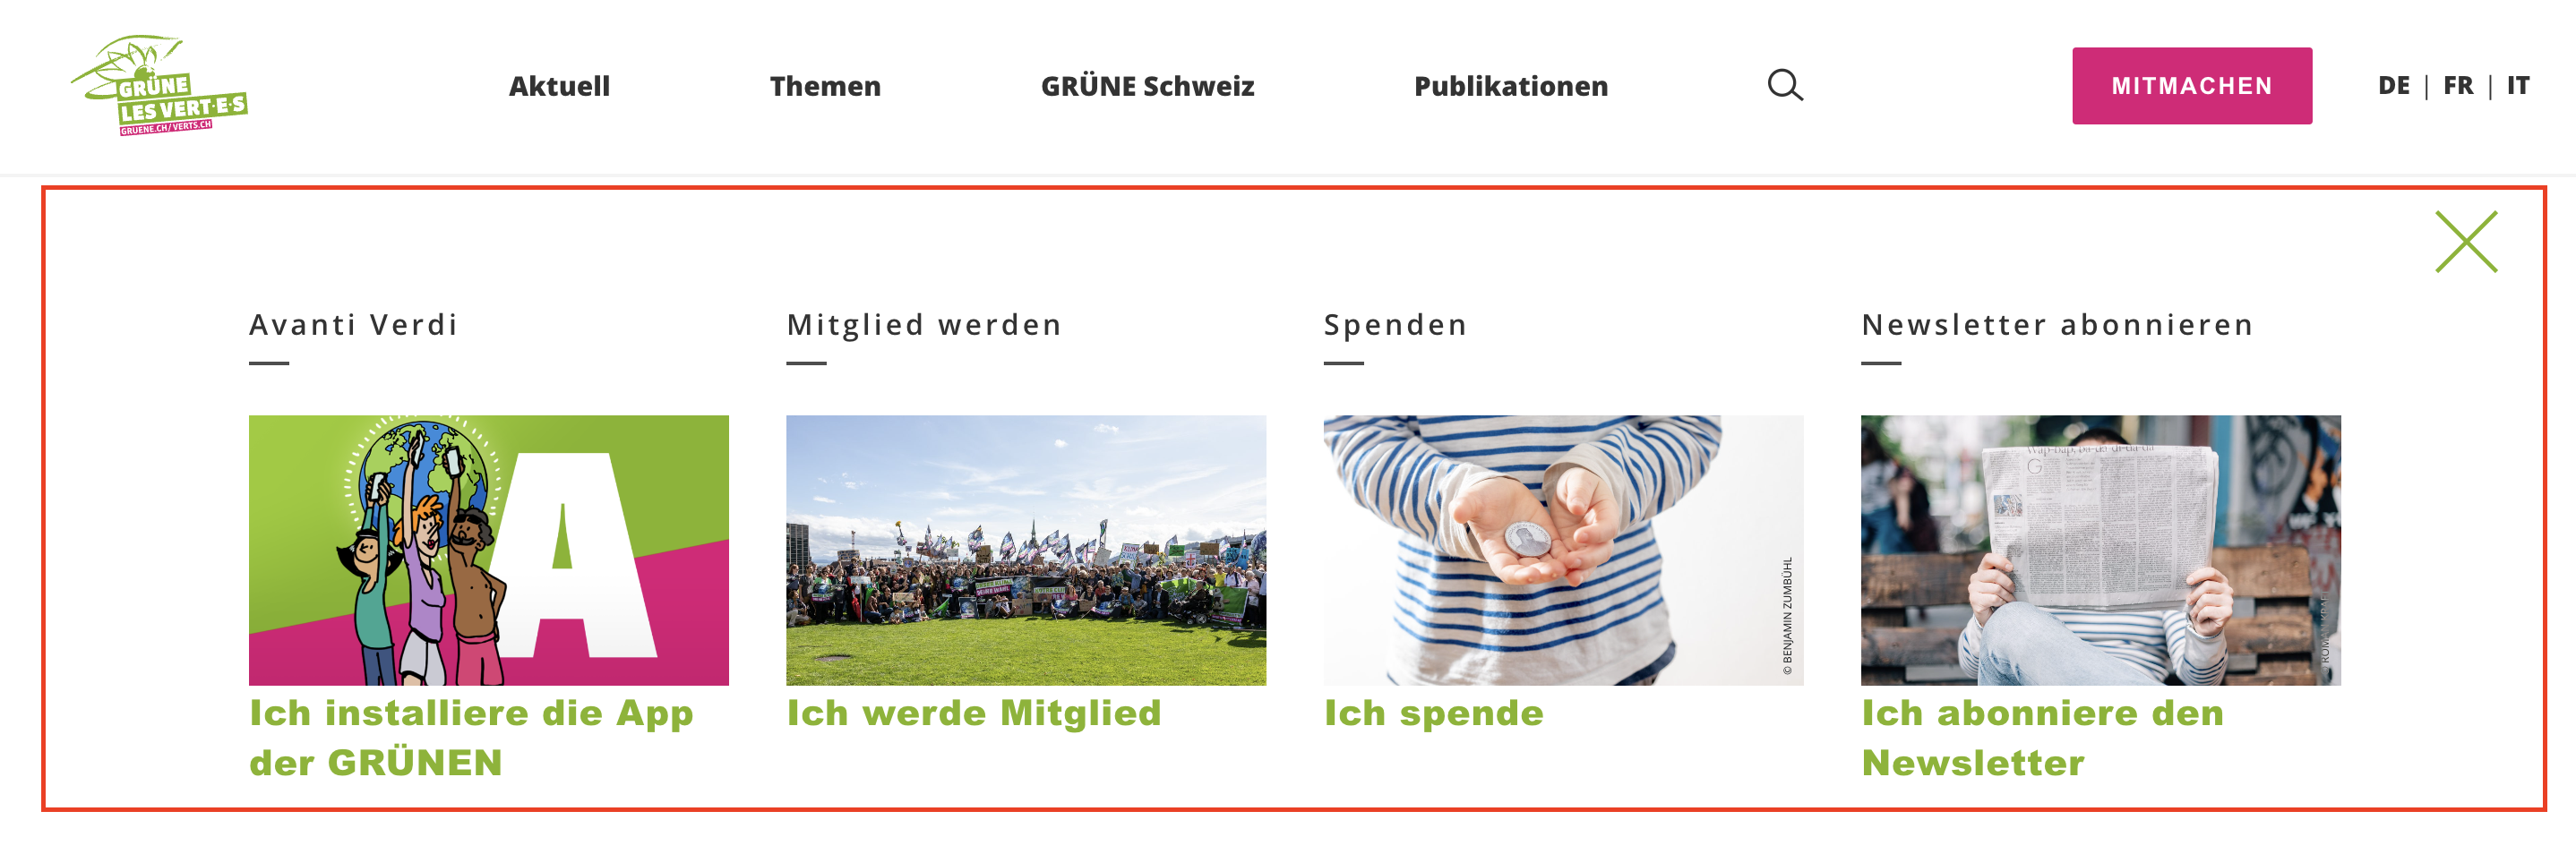
Featured Menu Items
If you need only two menu levels, you can use the Featured Menu Item setting to put a spotlight on a specific entry. To do so, toggle the Featured Menu Item setting and enter the required information.
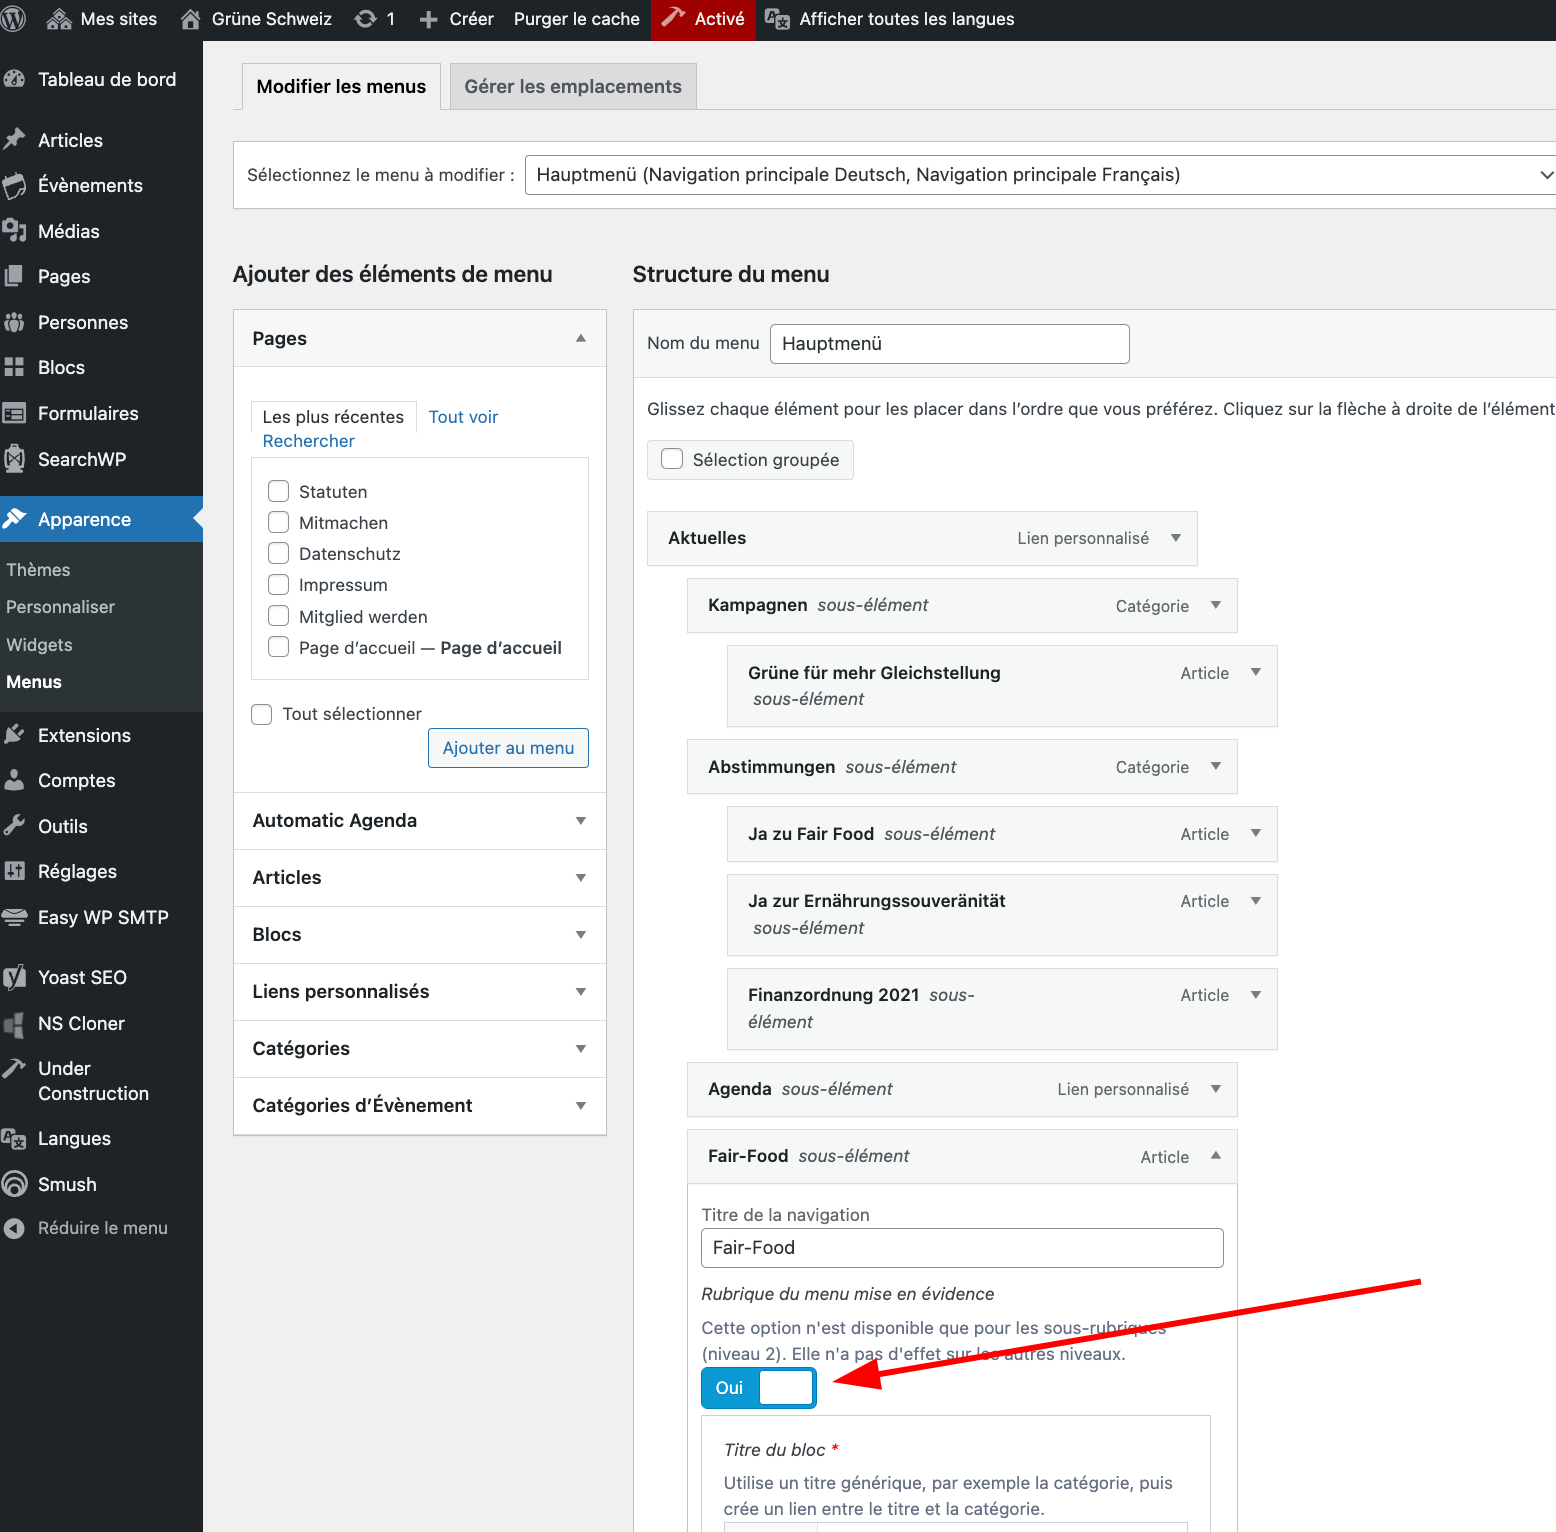
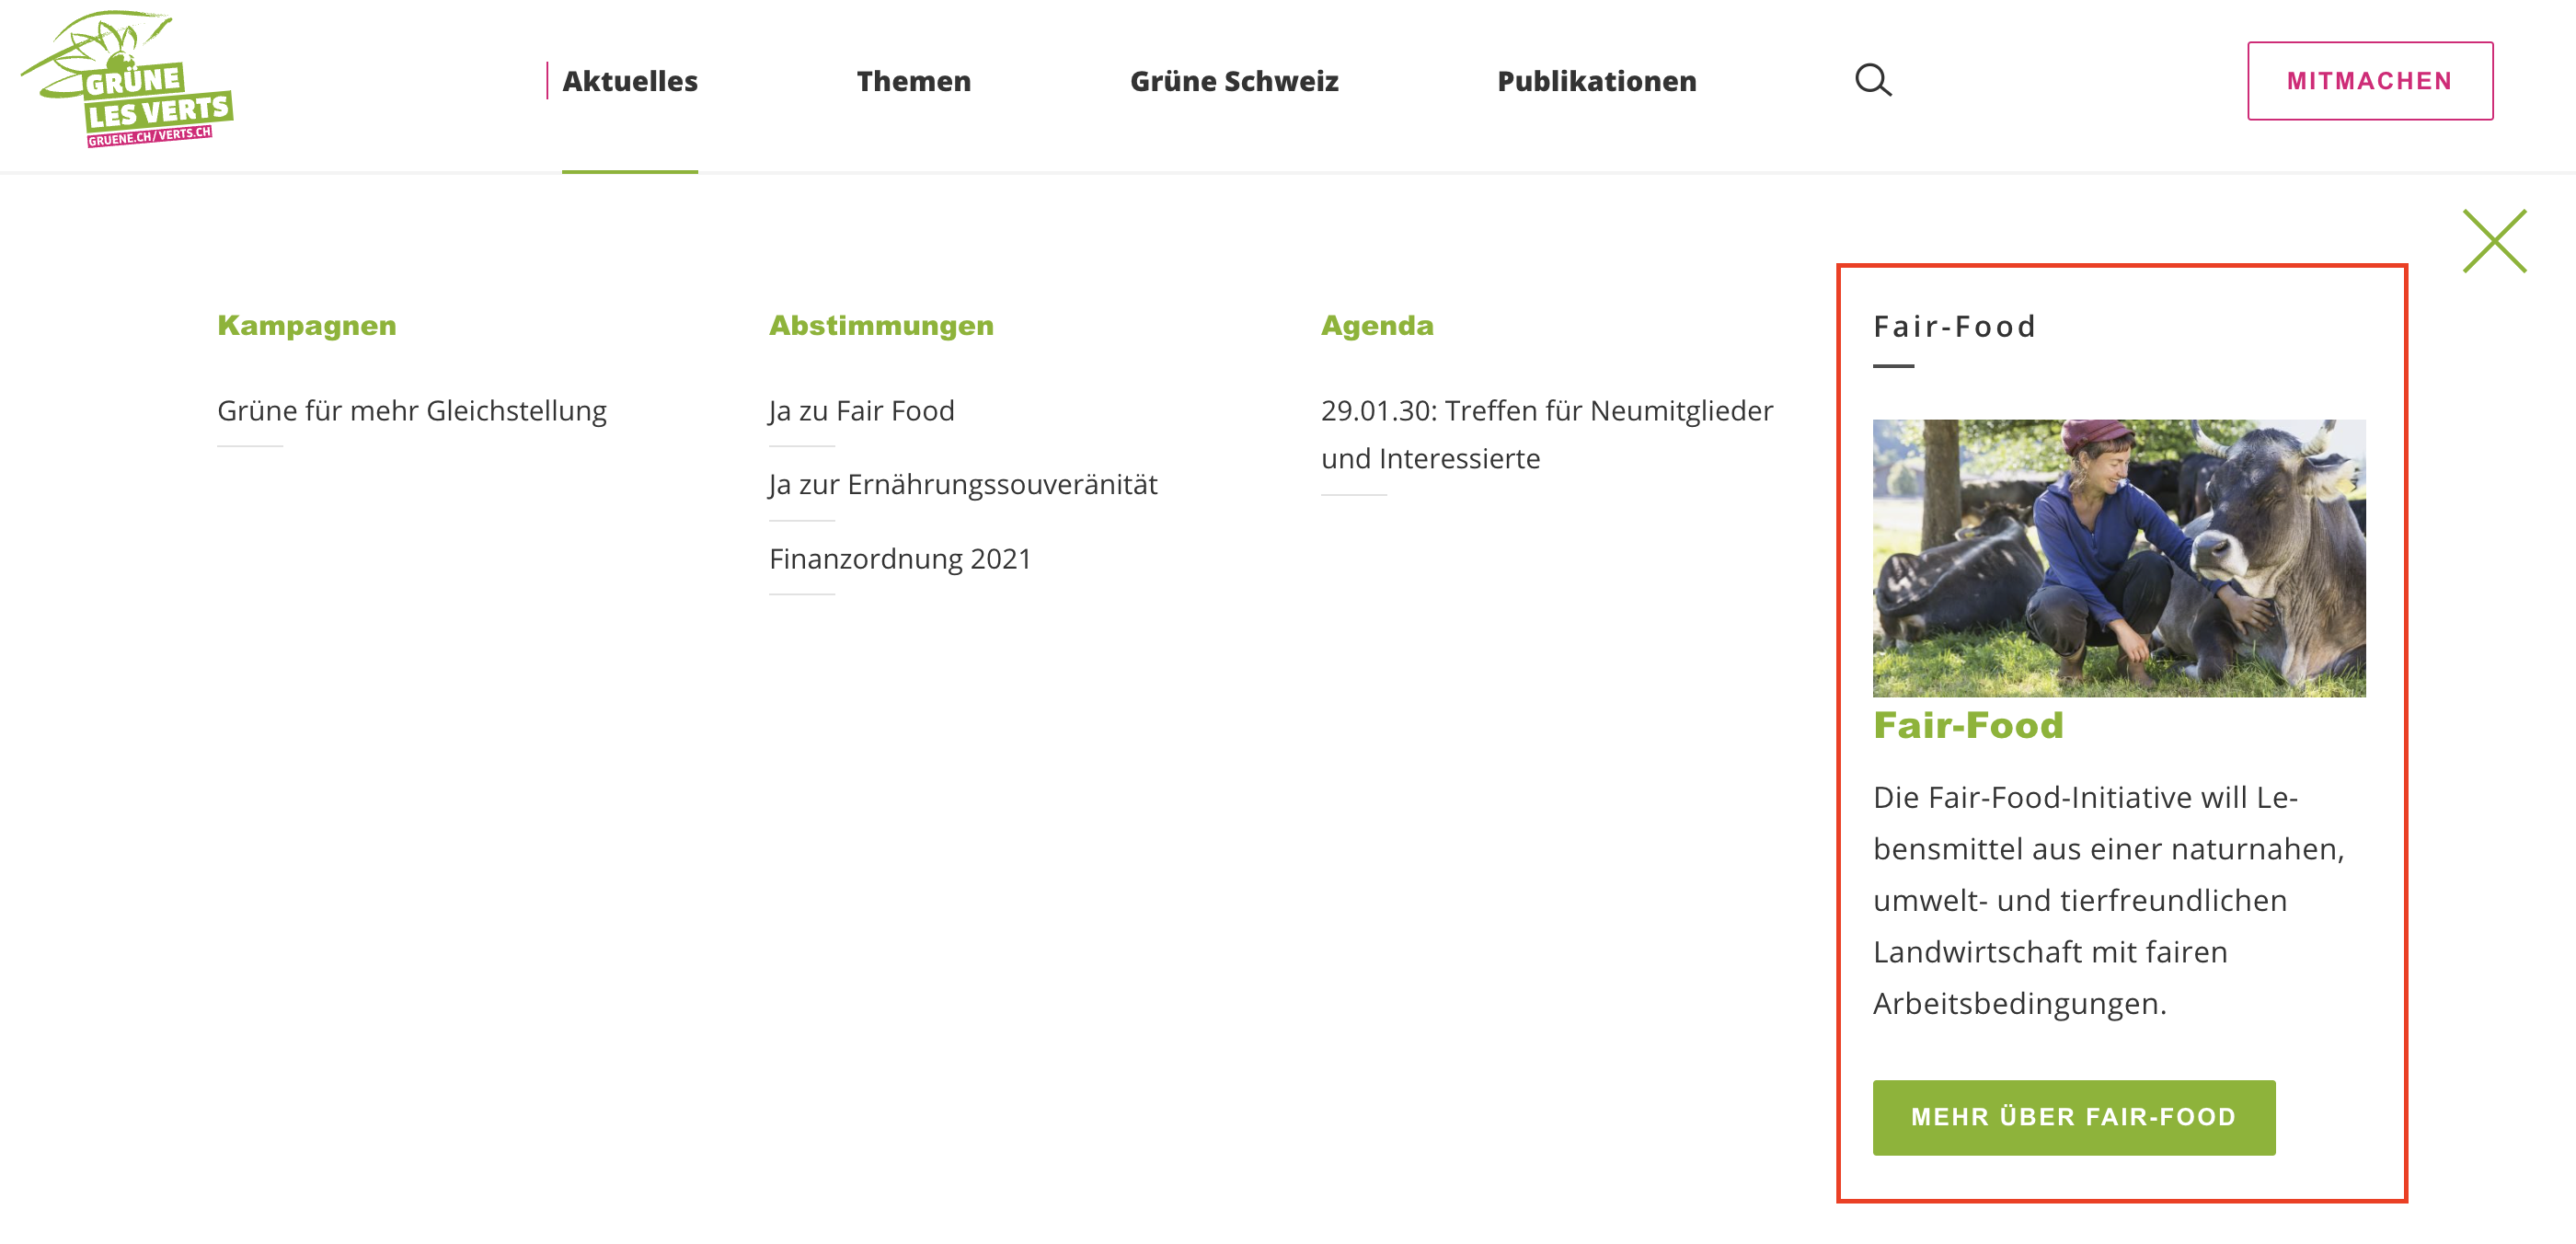
Note: This setting only works on menu level 2 (in the screenshot above, menu level 1 is Aktuelles, menu level 2 is Kampagnen, Abstimmungen, Agenda and Fair-Food).
It is also possible to feature all entries. Make sure there are no more than four. Here an example for the get active menu: